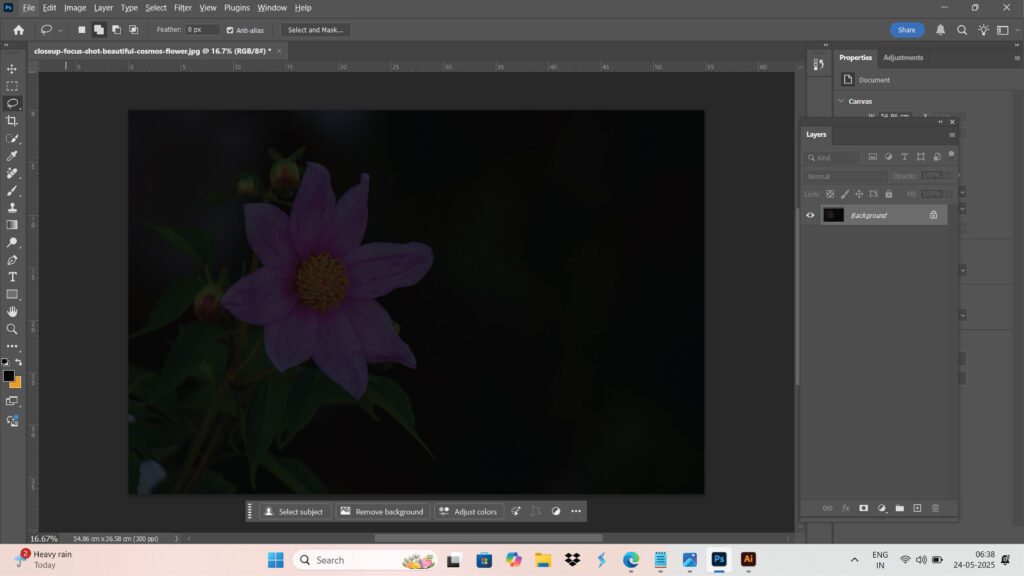
Have you ever taken a great shot, only to realize later that it’s way too dark? It’s happened to me many times—especially in low-light situations. But don’t worry, I’ve got a simple Photoshop trick that I personally use to fix underexposed photos in just a few seconds. Best part? It won’t wash out your colors or mess with the quality.
Let me show you how I do it.
Why This Trick Works
This method is based on Photoshop’s Screen blend mode, which lightens images in a very natural and non-destructive way. I love it because it’s fast, clean, and doesn’t mess with the original tones like some other tools do. It’s my go-to when I want to brighten a photo without spending too much time on adjustments.
My Step-by-Step Workflow to Brighten Photos
Step 1: Open the Image in Photoshop
First, open up the photo you want to fix. Just go to File > Open and select your underexposed image.
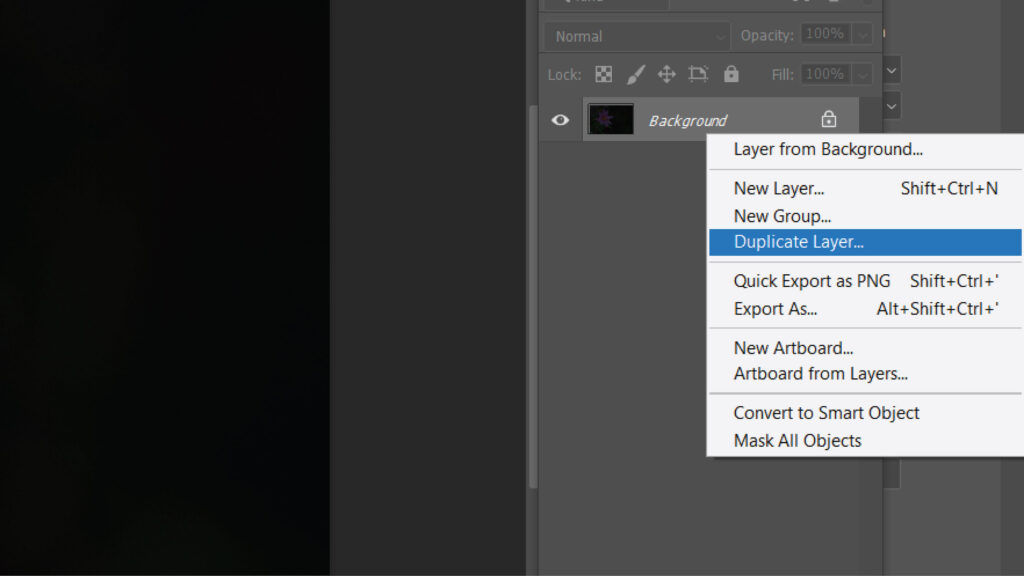
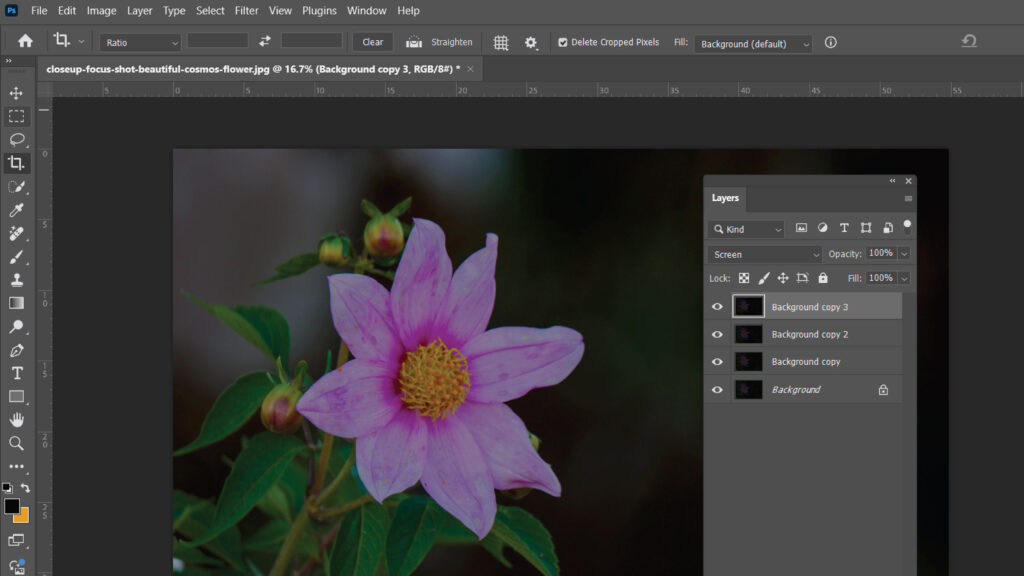
Step 2: Duplicate the Layer
Right-click on the background layer in the Layers panel and choose Duplicate Layer.
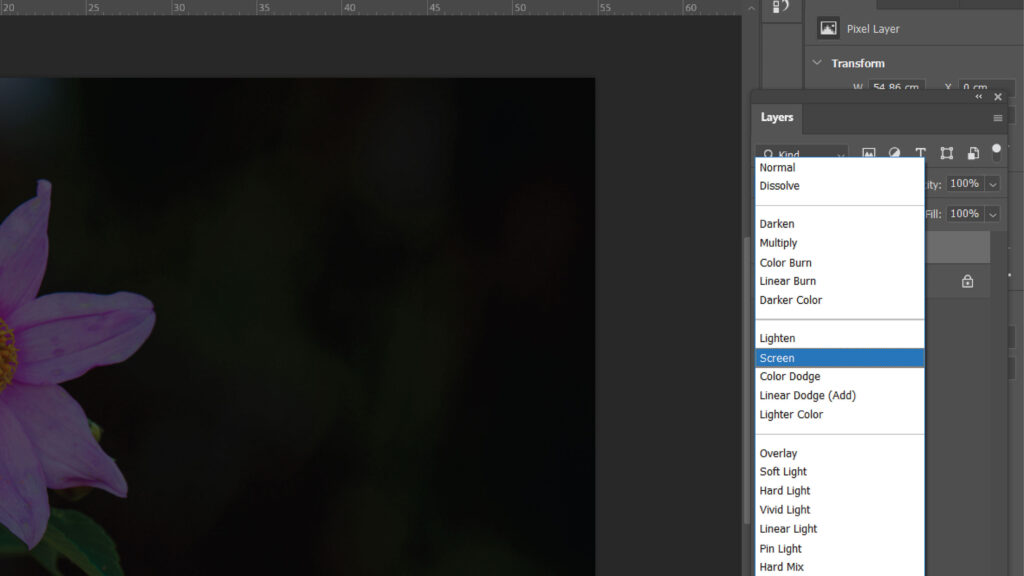
Step 3: Apply the Screen Blend Mode
With your duplicated layer selected, change the blending mode from “Normal” to Screen in the top-left corner of the Layers panel.
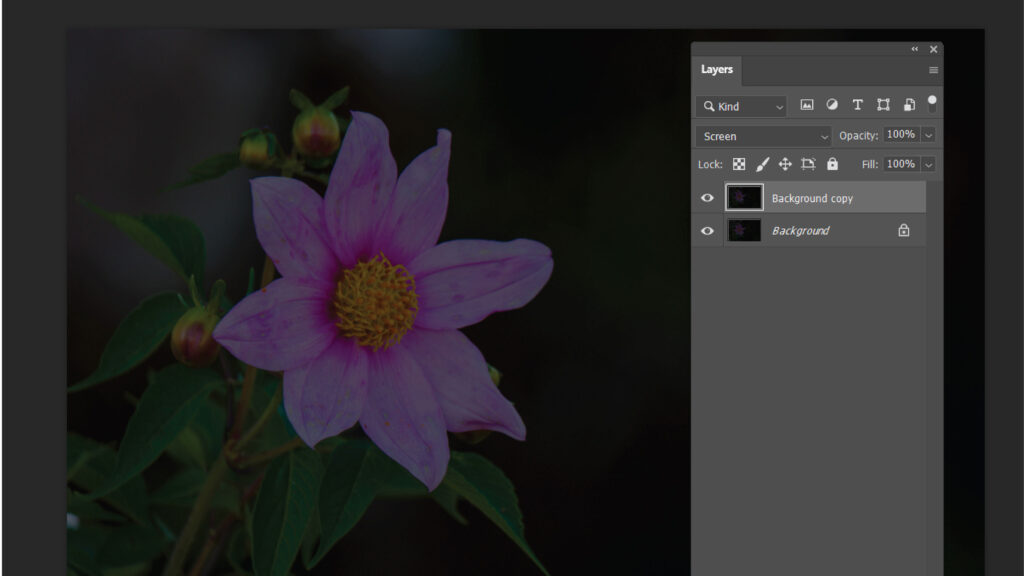
You’ll instantly see your image brighten up—just like magic !
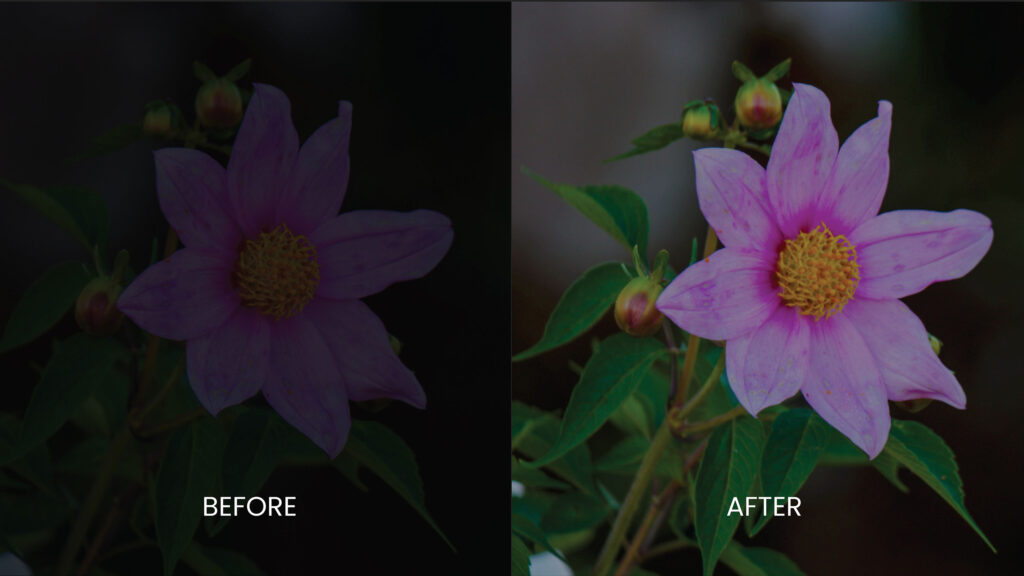
See the result below.
Step 4: Add More Light (If Needed)
If the image still looks a bit dark, here’s my trick: duplicate the Screen layer again.
Each time you duplicate it, the photo gets a bit lighter. I usually stop when it looks just right.
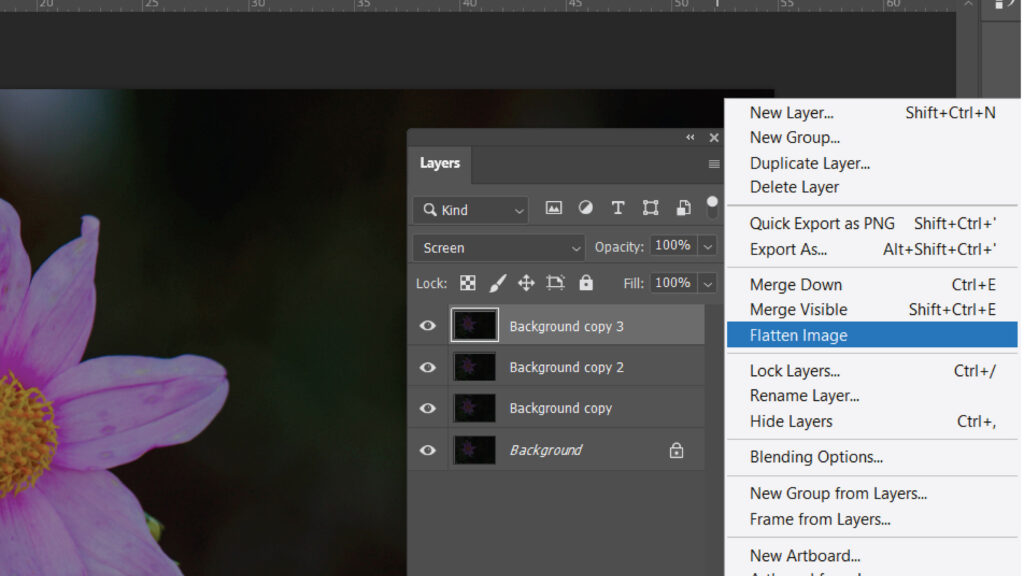
Step 5: Flatten and Save
Once you’re happy with the brightness, go to Layer > Flatten Image, and then File > Save As to save your newly exposed photo. That’s it!
See the before and after results below.
Why I Love This Trick
I’ve used this method for years now. It’s saved so many photos I thought were unusable! What I really like is how only the important parts get brightened—like the face or subject—while the rest stays balanced. No weird color shifts, no blown-out highlights.
Final Thought
This is one of those small Photoshop secrets I think every creative should know. Whether you’re editing client photos or just fixing up your own travel shots, this quick fix makes a big difference—and it only takes a few clicks.
Try it on one of your underexposed photos today and let me know how it turns out!